With Christmas dawning near at the speed of light, I've decided to take a break from stitching so I can concentrate on drawing again. Unfortunately, in recent days I've noticed something really peculiar with my 6 year old scanner. At first it started scanning things as if someone put coloured cellophane over it, then it started scanning with like, horizontal bars. Like when a printer gets all dry and makes lines in what it prints. I take it that it's a warning that maybe after Christmas I ought to buy a new scanner. Bit late to ask for one for then, gawd knows what mum and dad bought me apart from a Wii game I've been waiting to play for 3 months. In the meantime, I aim to draw more with the tablet.
I've got one more day of work tomorrow, and then I've got a 5 day weekend until next Monday. This will be such a blast, what with movies on the telly, games, family etc... wish I could have 2 weeks off though, just like the old days when I was at school age. Pros and cons of having to grow up, gotta love them.
Monday, December 22, 2008
Monday, December 15, 2008
Coming soon from StaceyW Arts
Good evening. I finally started work on my portfolio site. Very early stuff so far, and for some reason CSS has become easy again. I've not come up with a name for this site yet, but one thing's for sure, a dog looking very much like my own will be its official mascot.
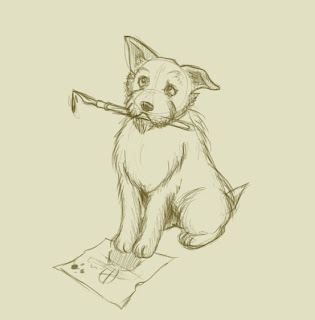
Blimey, the difference setting things to higher resolutions makes! And studying photos, Jessie doesn't really sit still for long enough when I'm drawing her. I'm currently painting this sketch up in Painter and it'll be used somewhere on the site for decoration. Thing is though I'm still trying to get my head around how blending and painting works in Painter, I still haven't found a brush I'm most comfortable with.
The site will showcase only the very best of my art. How much of that I haven't figured out yet, but either way this won't be launched until 2009.
Now if only everything I do these day doesn't hurt my back.
Saturday, December 13, 2008
Photoshop drawing video
Finally it's up.
I've been meaning to do a video like this for a really long time, and I realise now that it's much harder to work on something while the capture app is on because of the slight lag. It's basically to show what happens to the picture when I'm CGing stuff in Photoshop.
Yeah yea yeah I know my choice of music is shit bla bla volume slider.
Thursday, September 25, 2008
From the murky depths of our loft...
LOL Lion King.
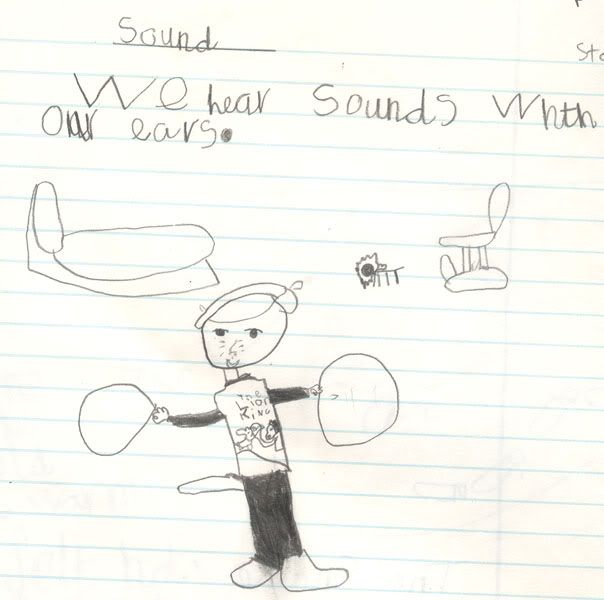
So last week, my dad took me and my sister up into the loft so we could get some old junk down and clear it up a bit. Some of the things we found included our old toys, books, a NES, and these horrid things. Or to put it lightly, drawings I made when I was in primary school.
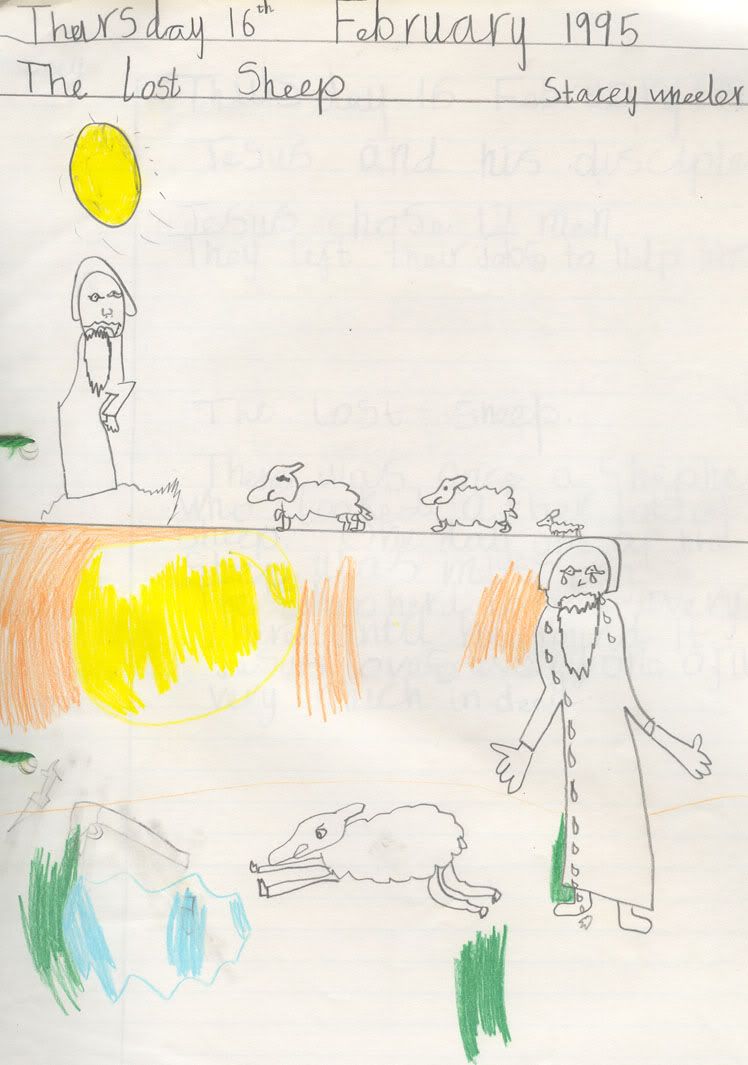
When I was in year 3, before I was moved into the special unit where I spent year 4, we crapped on several sheets of paper and bound them together with treasury tags to form books. I found 3 of those, Religious Education, Science and History.

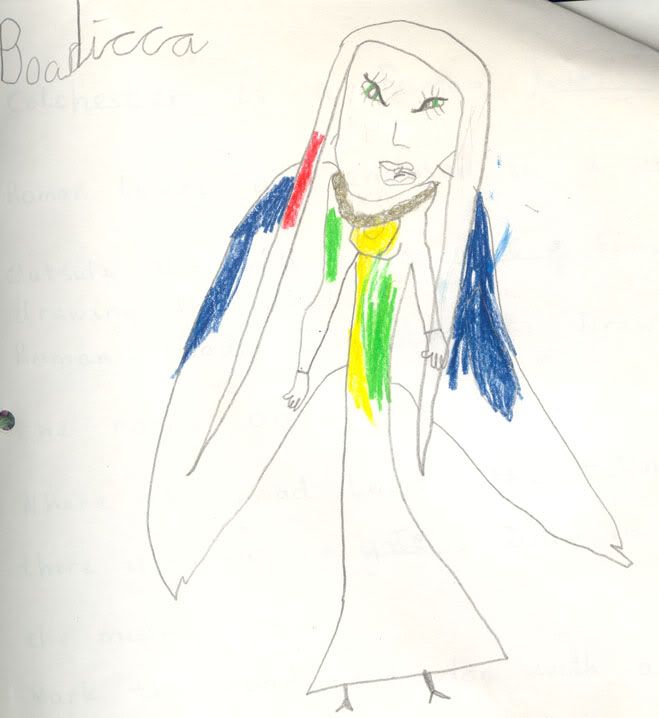
Seriously, what the hell?
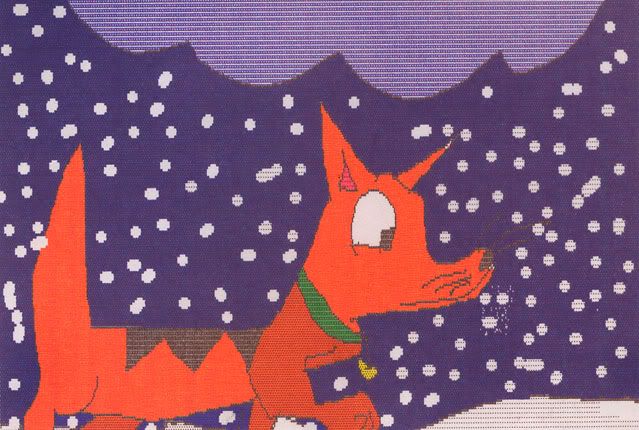
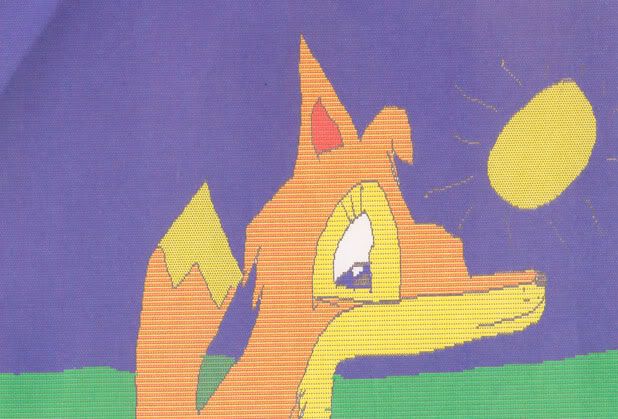
Now these I definitely remember drawing when I was in the unit. They had like this Acorn or Amiga computer or something that had an MSPaint like thing and I mostly drew canids. I can even remember wondering why certain bits wouldn't fill in because of one pixel. First one is just some dog, while the other is supposed to be Vixen from Animals of Farthing Wood or something. I dunno.
But damn, do they take me way back! I feel so damn old.
Friday, September 19, 2008
Me ol' Bamboo [or new, rather]
Earlier this week, I ordered a new Wacom tablet. It's come to my reality that I simply cannot afford the big Wacom daddies [Intuos or a Cintiq even...oh a girl can only dream], so I opted for a Bamboo one which costed me £30 from Amazon UK. I wasn't expecting the greatest quality from it, in fact it wasn't the same one pictured, but when it came yesterday and I started fiddling about with it...gawd, it's a LOT smoother than the old Aiptek I used for the past 5 years!
So I spent most of the day drawing little fan sketches as seen below.
As much as I'd love to have an Intuos or a Cintiq, they're really pricey and it would have taken me years to save up for one. At least I won't have to worry about it now and I can spend money on Christmas gifts. The Aiptek I believe, costed a little more than this, and here is why any Wacom tablet is better than that:
It also comes with Art Rage 2.5, which I've tried before, didn't really like, but if this CD has the full version I may try it again. But I installed Corel Painter 9 and have Photoshop, Paint Shop Pro and Flash anyway so it's no big deal really.
I urge anyone who's looking into getting a tablet to get a Wacom one. They're the best. No other tablet label does it better. Here it is in action.

So I spent most of the day drawing little fan sketches as seen below.


As much as I'd love to have an Intuos or a Cintiq, they're really pricey and it would have taken me years to save up for one. At least I won't have to worry about it now and I can spend money on Christmas gifts. The Aiptek I believe, costed a little more than this, and here is why any Wacom tablet is better than that:
- The only one used a serial port. How behind the times can you get? Even if I got it fixed up, I would have had to get a USB adapter to plug it in. All this thing has is a USB to slip in, easy as pie.
- I can't get over how smooth it is. Any lines the Aiptek made were really bumpy. The Bamboo doesn't do it 100% perfect, but it's still looks neater.
- Easier to set up, in fact, it worked straight away when I plugged it in. You do have to install the driver software to get the pressure levels, as with the Aiptek, but when I first used that it took a long time for it to start getting detected.
- NO BATTERY for the pen! That's right, the old one had to have a AAA battery in, and it was poorly built. The Bamboo pen doesn't need any of that that nonsense.
It also comes with Art Rage 2.5, which I've tried before, didn't really like, but if this CD has the full version I may try it again. But I installed Corel Painter 9 and have Photoshop, Paint Shop Pro and Flash anyway so it's no big deal really.
I urge anyone who's looking into getting a tablet to get a Wacom one. They're the best. No other tablet label does it better. Here it is in action.

Saturday, August 02, 2008
How I typically paint a painting
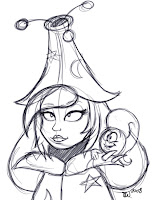
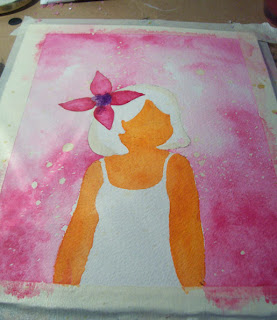
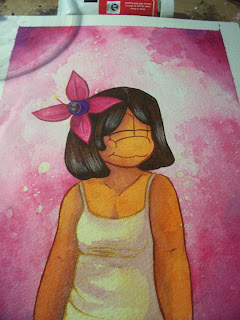
Hi again. I'm feeling generous today, so if you ever wondered how I make certain types of my art, now's the time to see. In this tutorial I'll be going through my latest painting, "Fuchsia Air", step by step. This painting used watercolour, gouache, graphite pencil, white acrylic ink and colour pencils.
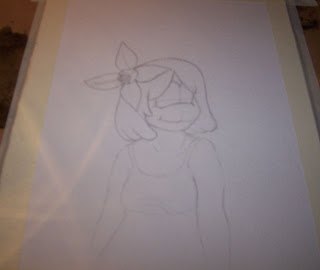
First, I taped up a piece of Waterford 300lb paper onto my card board with masking tape. That helps it to keep the painting taut while being worked on, and gives it a somewhat neat border around it [sometimes paint can leak underneath it but it's going to be digitally trimmed anyway]. Then I start my sketch, trying to be as neat as possible, which is important because erasing isn't a nice thing to do.
The next step is to apply masking fluid, which is a mixture of ammonia and latex and is used to protect certain parts of the paper from being painted on. You don't have to cover the whole character here, just around the edges, and I've flicked some about to make sparkles. A word of warning though: always use an old trashy brush to apply this stuff. It dries quickly to a sticky state on the brush and will not come off. It's also important to use a bottle within a year, otherwise it stains your paper with ugly yellow bits.
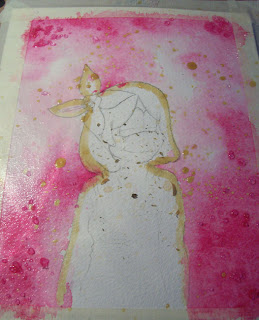
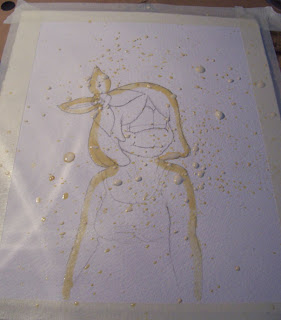
Now that the fluid is dry, I'll paint in the background with one colour. I painted it dry with a half-inch brush and then blended in some water. A few specks of salt were added, though I got impatient and used a hairdryer to dry it off. The masking fluid is then rubbed or peeled off, whichever is safest for your paper [it can tear sometimes], and now I'm ready to paint the character.
Here I started painting her skin and the fuchsia with a lot of colour. Most other artists use light washes and build it up, but I usually paint with thick colour depending on what colour a part is. The trick here is to work with that quickly but as neatly as possible, and to use an appropriate sized brush [here I used a size 2] to apply colour that's still wet. Texture can be added by lifting colour off with a wet tissue, the type you wipe your nose with as opposed to toilet paper.
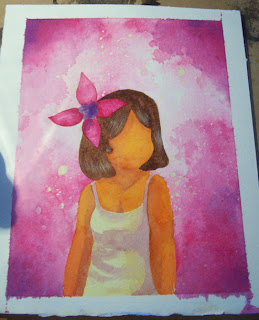
More parts of the drawing are filled in, and now I've started shading and highlighting. For the shading, I used violet paint, which works well with warmer colours. In fact, it works so well with wamer colours I added some around the edges of the background. For the initial highlights, I switch to a size 000 brush and paint in some white acrylic paint as lightly and carefully as possible. The masking tape is removed early as no more work is needed for the background.
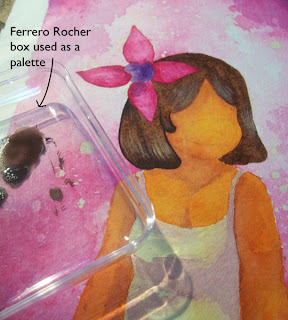
Time to bring in another medium, gouache. This is like watercolour, but with white paint mixed in, making a much thicker paint. Recently I found it very effective to produce coloured lineart in a traditional piece, as opposed to colouring pencils and re-inking which I used to do and didn't make good enough results. The gouache I use it a bit too thick straight from the tube, so I mix it with water on a non-absorbant material [like this Fererro Rocher box I re-used] to make it flow better.
White watercolour paint is added instead of the acrylic ink to give more subtle highlighting, such as in the flower. If it's too light, it can be painted over. The lineart is applied as carefully as possible with the 000 brush.
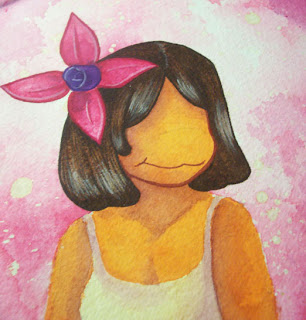
The lineart is done now, but I found that the yellow ochre I used for the nightie didn't look so good so I went over it with a 2H pencil, a HB is too dark for that. More shading is applied as well, but again this has to be done with care to avoid the gouache from running - dry gouache paint can be reused when water is used on it. I also started applying details, like the stigma of the fuchsia.
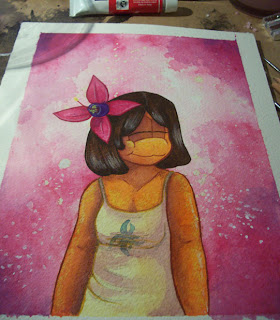
Final touches are added, like the design on the nightie which is painted in blue to add a little cool colour to a warm painting, and white speckles painted on with the acrylic ink. Since this is textured paper I'm using, I picked up a couple of colouring pencils and drew on certain parts to indicate scales, mainly on her face, chest and arms.
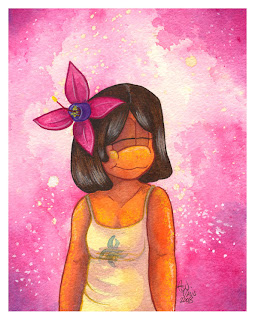 And here is the final result. I hope that this tutorial is helpful and informative, and until I show up with another tutorial, happy painting!

First, I taped up a piece of Waterford 300lb paper onto my card board with masking tape. That helps it to keep the painting taut while being worked on, and gives it a somewhat neat border around it [sometimes paint can leak underneath it but it's going to be digitally trimmed anyway]. Then I start my sketch, trying to be as neat as possible, which is important because erasing isn't a nice thing to do.

The next step is to apply masking fluid, which is a mixture of ammonia and latex and is used to protect certain parts of the paper from being painted on. You don't have to cover the whole character here, just around the edges, and I've flicked some about to make sparkles. A word of warning though: always use an old trashy brush to apply this stuff. It dries quickly to a sticky state on the brush and will not come off. It's also important to use a bottle within a year, otherwise it stains your paper with ugly yellow bits.

Now that the fluid is dry, I'll paint in the background with one colour. I painted it dry with a half-inch brush and then blended in some water. A few specks of salt were added, though I got impatient and used a hairdryer to dry it off. The masking fluid is then rubbed or peeled off, whichever is safest for your paper [it can tear sometimes], and now I'm ready to paint the character.

Here I started painting her skin and the fuchsia with a lot of colour. Most other artists use light washes and build it up, but I usually paint with thick colour depending on what colour a part is. The trick here is to work with that quickly but as neatly as possible, and to use an appropriate sized brush [here I used a size 2] to apply colour that's still wet. Texture can be added by lifting colour off with a wet tissue, the type you wipe your nose with as opposed to toilet paper.

More parts of the drawing are filled in, and now I've started shading and highlighting. For the shading, I used violet paint, which works well with warmer colours. In fact, it works so well with wamer colours I added some around the edges of the background. For the initial highlights, I switch to a size 000 brush and paint in some white acrylic paint as lightly and carefully as possible. The masking tape is removed early as no more work is needed for the background.

Time to bring in another medium, gouache. This is like watercolour, but with white paint mixed in, making a much thicker paint. Recently I found it very effective to produce coloured lineart in a traditional piece, as opposed to colouring pencils and re-inking which I used to do and didn't make good enough results. The gouache I use it a bit too thick straight from the tube, so I mix it with water on a non-absorbant material [like this Fererro Rocher box I re-used] to make it flow better.

White watercolour paint is added instead of the acrylic ink to give more subtle highlighting, such as in the flower. If it's too light, it can be painted over. The lineart is applied as carefully as possible with the 000 brush.

The lineart is done now, but I found that the yellow ochre I used for the nightie didn't look so good so I went over it with a 2H pencil, a HB is too dark for that. More shading is applied as well, but again this has to be done with care to avoid the gouache from running - dry gouache paint can be reused when water is used on it. I also started applying details, like the stigma of the fuchsia.

Final touches are added, like the design on the nightie which is painted in blue to add a little cool colour to a warm painting, and white speckles painted on with the acrylic ink. Since this is textured paper I'm using, I picked up a couple of colouring pencils and drew on certain parts to indicate scales, mainly on her face, chest and arms.
 And here is the final result. I hope that this tutorial is helpful and informative, and until I show up with another tutorial, happy painting!
Sunday, June 29, 2008
Card making
In all honesty I haven't been making a lot of digital art as of late because once again my tablet has gone a bit doo-lally. While I found that I can make oekaki art for example entirely with a mouse, it just feels a lot better with a tab. So, I've taken up the art of card making.
 This one here is an original painting that I just painted onto a bit of watercolour paper I folded in half, and for once, I'd take a crack at using gouache paints again as well as watercolour and white ink. I found that using an older shader brush can achieve some realistic effects, like the daisies in the grass, the foliage in the background and the tarmac. As with all techniques, it takes practice to get it the way you want it. The full picture can be found here.
 It's a little known fact that I really like cross-stitching. Although very time consuming, it's a soothing activity for me really, and a rewarding one too, as the finished results can make great gifts for the family, even if they were copied from magazine designs. During the last few months of last year I was working on a Christmas themed one that I aimed to give to my nan as a present, and despite a few mistakes here and there, it turned out to be a lovely gift that my nan loved.
This one above is old, must have finished it months ago, but it was only until last week I decided to make it into a card. In Hobbycraft, they sell lots of different cards that are designed for card making - ones that come in different colours and sizes, and one that have already had holes cut in them, perfect for stitchings to be stuck in. For this though, I had to buy two, and cut a heart shape in one of them to match the shape of the heart. Maybe I should get cookie cutters next time and try those to cut out neater shapes. I don't know who to give this one too, so I'll make a few more. I just hope that they never get thrown away after all the hard work I put into the stitching.
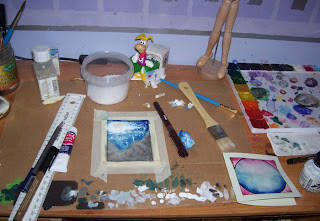 Back to paints now, and here is my desk that gets easily trashed, and two more cards that I'm painting on. The one on the right is done entierly in gouache so far, as it is much more opaque than watercolour. For the other one...something tells me that the masking fluid I'm using is going a bit off, and it ain't just in the smell, it also discolours [and sometimes tears!] the paper.
It might be quicker and cheaper just to get a pack of 40 Christmas cards from your local Woolworths, but to me, making my own cards feels like I'm putting my own effort in it. What it was, I bought a pack from the charity shop I work in and gave a card to each of the other volunteers, and my manager said to me "These look like PDSA cards". Quite embarrassing as back then I was a bit strapped for cash.
 This one here is an original painting that I just painted onto a bit of watercolour paper I folded in half, and for once, I'd take a crack at using gouache paints again as well as watercolour and white ink. I found that using an older shader brush can achieve some realistic effects, like the daisies in the grass, the foliage in the background and the tarmac. As with all techniques, it takes practice to get it the way you want it. The full picture can be found here.
  It's a little known fact that I really like cross-stitching. Although very time consuming, it's a soothing activity for me really, and a rewarding one too, as the finished results can make great gifts for the family, even if they were copied from magazine designs. During the last few months of last year I was working on a Christmas themed one that I aimed to give to my nan as a present, and despite a few mistakes here and there, it turned out to be a lovely gift that my nan loved.
This one above is old, must have finished it months ago, but it was only until last week I decided to make it into a card. In Hobbycraft, they sell lots of different cards that are designed for card making - ones that come in different colours and sizes, and one that have already had holes cut in them, perfect for stitchings to be stuck in. For this though, I had to buy two, and cut a heart shape in one of them to match the shape of the heart. Maybe I should get cookie cutters next time and try those to cut out neater shapes. I don't know who to give this one too, so I'll make a few more. I just hope that they never get thrown away after all the hard work I put into the stitching.
 Back to paints now, and here is my desk that gets easily trashed, and two more cards that I'm painting on. The one on the right is done entierly in gouache so far, as it is much more opaque than watercolour. For the other one...something tells me that the masking fluid I'm using is going a bit off, and it ain't just in the smell, it also discolours [and sometimes tears!] the paper.
It might be quicker and cheaper just to get a pack of 40 Christmas cards from your local Woolworths, but to me, making my own cards feels like I'm putting my own effort in it. What it was, I bought a pack from the charity shop I work in and gave a card to each of the other volunteers, and my manager said to me "These look like PDSA cards". Quite embarrassing as back then I was a bit strapped for cash.
Monday, March 31, 2008
Eyes-a-popping Joe
Oh my god.
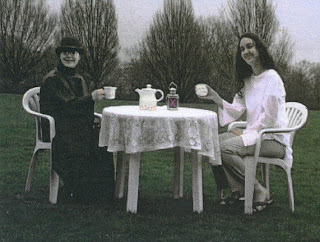
See that fella on the left? That's me, during the only shot I had at acting. I played the main character of a film my sister was working on when she was studying media at college way back in 2004, called "Eyes-a-Popping Joe". Not sure what exactly it was about, but I think it was about this guy trying to warn a young girl [played by my younger sister] that she's gonna get run over by a car. Apparently it was supposed to be a surreal film.
Filming it was quite an experience. It was shot at the beginning of 2004 during the winter, and god only knows how cold it was while I was clad in a thin back cloak, the slipperiest shoes I've ever worn, a hat, and two of those goggly eyes from one of those bouncy eyes glasses things from the joke shops. I had to walk all the way to the park like this, carrying the props with me which made my arms ache right into the next week.
It was then a long day of sitting on the damp grass and playing my parts, where I have a tea party with Jesus [played by my sister's friend, who's female BTW] and try to suffocate the young girl with a pillow. Man, the laughs we had due to our poor acting, but eh, no-one else would do it. The final result was a ten minute film with some weird colour effects and a Billy Idol song at the end. You should see the damn out-takes, they're quite hilarious.
Friday, March 07, 2008
Art dump numero dos
Blimey, after looking through my 2008 art folder it seems that I've been doing more art than I thought. So here's just a selection of what I've done in the past month.
This is one of a number of commissions that I've sold to a few members of furry website Furaffinity for $5 a piece. I had to lower my usual price so that I could quickly round up some money in order to pay for an eBay sellers' fee that pretty much took me by surprise. The first lot's been paid, and now I'll have to wait for the next invoice to come. In the meantime, I've been selling a few DVDs that we don't watch anymore, and thankfully all of the ones I put up so far sold.

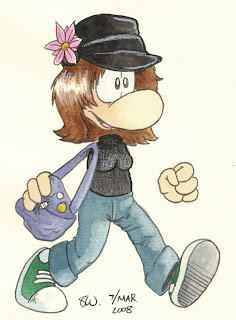
A couple of weeks ago, I came across a toddlers' programme on Nick Jr called Yo Gabba Gabba, which pretty much absorbed me these past few days. It's kinda like Sesame Street but shorter, with only 5 costume characters, and with more modern musical pieces. Soon I had read an article about how some hackers used a picture of Brobee to deface a Metropolitan Police website, which was one of the funniest things I read last week. So, here is Brobee being a British policeman, watching you in a newsagent near you.

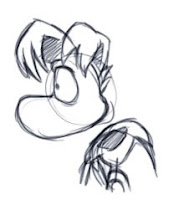
As of late I have come back to one of my old fandoms, the Rayman fandom. I bought a copy of Rayman Raving Rabbids for the GBA the other day [more info on that will be posted on my new Rayman blog], and this picture was inspired by a certain level in said game.
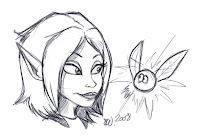
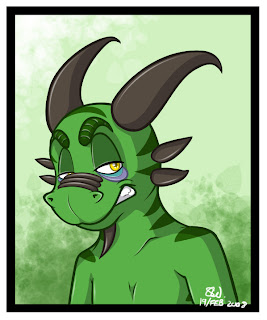
I've also made myself into one of Rayman's kind for use in the Rayman fandon. Not to worry, I'm still keeping Robo.
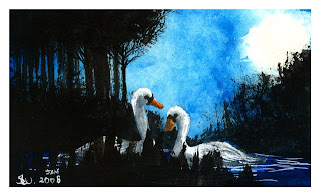
Lastly is an original that I am quite proud of. For this I had been experimenting with Chinese brushes and ink, which were effective for making silhouettes of trees and foliage in the moonlight. I think I was remembering some scene in a collection of Disney cartoons called Make Mine Music where there were two swans flying about in a blue lagoon. Other than that I'm not sure why exactly I chose to paint swans, but eh, anything for an original piece.

This is one of a number of commissions that I've sold to a few members of furry website Furaffinity for $5 a piece. I had to lower my usual price so that I could quickly round up some money in order to pay for an eBay sellers' fee that pretty much took me by surprise. The first lot's been paid, and now I'll have to wait for the next invoice to come. In the meantime, I've been selling a few DVDs that we don't watch anymore, and thankfully all of the ones I put up so far sold.

A couple of weeks ago, I came across a toddlers' programme on Nick Jr called Yo Gabba Gabba, which pretty much absorbed me these past few days. It's kinda like Sesame Street but shorter, with only 5 costume characters, and with more modern musical pieces. Soon I had read an article about how some hackers used a picture of Brobee to deface a Metropolitan Police website, which was one of the funniest things I read last week. So, here is Brobee being a British policeman, watching you in a newsagent near you.

As of late I have come back to one of my old fandoms, the Rayman fandom. I bought a copy of Rayman Raving Rabbids for the GBA the other day [more info on that will be posted on my new Rayman blog], and this picture was inspired by a certain level in said game.

I've also made myself into one of Rayman's kind for use in the Rayman fandon. Not to worry, I'm still keeping Robo.

Lastly is an original that I am quite proud of. For this I had been experimenting with Chinese brushes and ink, which were effective for making silhouettes of trees and foliage in the moonlight. I think I was remembering some scene in a collection of Disney cartoons called Make Mine Music where there were two swans flying about in a blue lagoon. Other than that I'm not sure why exactly I chose to paint swans, but eh, anything for an original piece.
Friday, January 25, 2008
Bye Bye Wartie
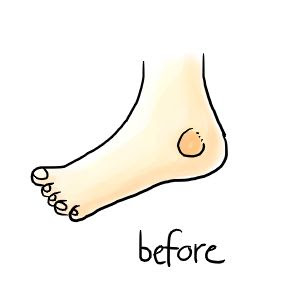
A mere two hours ago, I had my first ever operation. A simple procedure that took only ten minutes, in which I had a big wart taken off of my ankle. I had the thing for several years, and only recently it had become problematic because it looked like it was going to fall off, and whenever I got dressed and that, it'd catch it and sting.
Basically, it looked like this.
 And after I had the op...
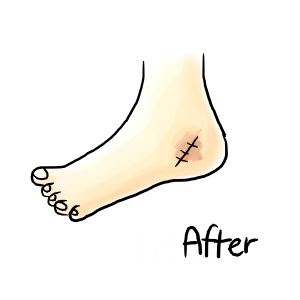
... I had three stitches, and I'll have to come back next week to have them taken out. Because of these I'm not sure on whether or not I should go to work or not since one of my only means of getting there is by walking. If anything is not right by Monday I'll give them a call. So why am I posting this? Well, because this blog is also about my real life experiences, and that was quite an experience to me since I never had any operation in my entire life. Besides, this blog needs an update anyway.
It started with the usual iodine application they do, and a local anaesthetic near the wart. I'm not really one for needles, so there I just took deep breaths, and that was over. All I could feel then was the doctor and nurse pulling the skin about and make the stitches, and after about ten minutes as I said, it was done. I couldn't put my shoe back on though, so I had to limp about with half of my sock on my toes. Maybe I should have brought a slipper. Oh well.
At least now, I won't have anyone being grossed out by the "thing on my ankle" anymore, neither would I worry about my clothes catching it. All I'm worried about now is how I'm going to shower with that dressing on...
Basically, it looked like this.
 And after I had the op...
... I had three stitches, and I'll have to come back next week to have them taken out. Because of these I'm not sure on whether or not I should go to work or not since one of my only means of getting there is by walking. If anything is not right by Monday I'll give them a call. So why am I posting this? Well, because this blog is also about my real life experiences, and that was quite an experience to me since I never had any operation in my entire life. Besides, this blog needs an update anyway.
It started with the usual iodine application they do, and a local anaesthetic near the wart. I'm not really one for needles, so there I just took deep breaths, and that was over. All I could feel then was the doctor and nurse pulling the skin about and make the stitches, and after about ten minutes as I said, it was done. I couldn't put my shoe back on though, so I had to limp about with half of my sock on my toes. Maybe I should have brought a slipper. Oh well.
At least now, I won't have anyone being grossed out by the "thing on my ankle" anymore, neither would I worry about my clothes catching it. All I'm worried about now is how I'm going to shower with that dressing on...
Subscribe to:
Posts (Atom)